Pages

Showing posts with label Homemade. Show all posts

Sunday, December 1, 2013

Perfect Apple Pie

This Perfect Apple Pie was beautiful and absolutely perfect!  I made a lattice crust instead of the usual double crust since it was for Thanksgiving.  A lattice crust is easier than you think - click here for a link on how to make a lattice crust.  I had a hard time not eating any of this pie and had to wait a whole day to share it with my family at Thanksgiving.  I ate so much this past week!  It was great spending time with my family and my uncle even made donuts for Chanukah.  I made latkes too, recipe to be posted soon!  Sorry I'm so behind on posting recipes these days and hopefully I'll find time to try to keep up.  Hope you all had a Happy Thanksgiving and Chag Chanukah!  Enjoy!


Perfect Apple Pie

Ingredients for Crust
2 ½ cups flour, all purpose
1 teaspoon salt
2 tablespoons sugar
¾ cup unsalted butter, chilled and cut into small cubes
½ cup vegetable shortening, cut into large cubes
6 to 8 tablespoons ice cold water


Directions for Crust

In a food processor, pulse to combine flour, salt and sugar.  Add in butter and pulse 4 to 5 times.  Add shortening and pulse 4 to 5 times.   


Add in 6 tablespoons of ice cold water and pulse a few more times.  Add water 1 tablespoon a time if needed.  The dough should be crumbly and stick together.


Place dough on a lightly floured surface.  Divide the dough into 2 balls and flatten into  4-5 inch sized disks.  (Do not over knead dough.)  

Wrap dough in plastic and refrigerate for at least 1 hour or up to 2 days.  When ready to roll, make sure it is not too stiff or allow to sit at room temperature for 5 minutes beforehand.


Lightly flour surface and place dough on top to roll out.   Use a rolling pin from center of dough outwards.  Roll until large enough for pie plate.  Repeat for a double crust.


Ingredients for Filling
4 tart apples, cored and thinly sliced (I used granny smith apples.)
3 sweet apples, cored and thinly sliced (I used pink lady apples.)
1/3 cup sugar
¼ cup flour, all purpose
1 teaspoon cinnamon
½ teaspoon nutmeg
¼ teaspoon allspice
¼ teaspoon salt
1 lemon, juiced and zested
1 egg, beaten for egg wash (optional)


Directions for Filling

Preheat oven to 425 degrees F.

In a large bowl, mix sugar, flour, cinnamon, nutmeg, allspice and salt.  Stir in apples until well mixed.  Add in lemon juice and zest.


Spoon apple filling into pie shell.  


Place second rolled pie crust on top of filling.  Trim any extra pie crust overhanging edge of pie plate.  Press to seal crust.  Cut slits to allow excess steam out.


Optional:  Paint top of crust with egg wash with a brush for a golden color.


Bake  for 25 minutes.  Lower oven temperature to 350 degrees F and bake for additional 30 to 40 minutes.


Allow to cool before cutting.  


Store at room temperature, covered, for up to 2 days. Refrigerate for additional 2 to 3 days.


Monday, November 25, 2013

Homemade Vanilla Extract


I had no idea I could make my own vanilla extract!  This Homemade Vanilla Extract would make a perfect gift for the holidays and it is so easy to make too.  I did some online research and it seems that there is no reason to use fancy alcohol so a mid-range will do.  I estimate 3 vanilla beans per cup of alcohol so if you have a larger jar, you may adjust accordingly.  The vanilla beans smell so good and I read that you can make vanilla scented sugar.  Just place a vanilla bean in a jar of sugar and that's it!  How easy is that?  Enjoy!

 
Homemade Vanilla Extract

Ingredients
1 cup alcohol (vodka, rum or bourbon)
3 vanilla beans


Directions

Split vanilla beans using a small paring knife.


Place vanilla beans in a glass jar with a tight fitting lid.

Pour your alcohol of choice into the jar with vanilla beans. 


Push vanilla beans down so they are submerged.

Seal the jar and store in a cool, dark place (i.e. back of cupboard) for at least 1 month. 


Shake jar once a week.  


Notes: The vanilla extract will keep for up to 1 year at room temperature.  You can top jar off with enough alcohol to keep vanilla beans submerged.  Replace vanilla beans as they start to lose their flavor (about every 3 to 6 months).

Monday, May 27, 2013

Strawberry Ice Cream


I wish I had bought my ice cream maker sooner!  My first try at making this strawberry ice cream was a success.  Homemade ice cream tastes so much better and it will be hard for me to buy grocery store ice cream again.  It is so delicious, especially with fresh strawberries.  I brought this straweberry ice cream for dessert when I had dinner with a friend recently and she called me a week later to tell me she's still thinking about how good the strawberry ice cream was!  That must tell you how good this strawberry ice cream really tastes.  It is creamy and delicious and every bite tastes like fresh strawberries.  I suggest you go out and get an ice cream maker ASAP and make this strawberry ice cream!  Enjoy!


Strawberry Ice Cream

Ingredients
1 ½ cups whole milk
1 ½ cups heavy cream
¾ cup sugar
1 ½ teaspoons vanilla
1 ½ cups strawberries, hulled
1/8 teaspoon salt


Directions

Put hulled strawberries in food processor and pulse until finely or roughly chopped.  

In a large bowl, whisk to combine milk, heavy cream, sugar, and salt.  Continue to whisk until sugar is dissolved.
Stir in strawberries (including juices).

Pour the mixture into the freezer bowl of an ice cream maker, and freeze according to manufacturer's directions.

*Took about 20 minutes.


Store in an airtight container and place in the freezer.

Wednesday, December 12, 2012

Peanut Butter and Banana Dog Treats


We are doing a charity bake sale at work this week and I wanted to make some dog treats to sell.  These peanut butter and banana dog treats passed the Buddy and Ellie test.  Buddy is the most impatient with food and treats so he could hardly wait to try one!  Can see you see that is he not even looking at me but he's looking up at the counter where the cookies are?  I really do enjoy making homemade dog treats because I know exactly what the ingredients are and I know its healthy.  This is also a great recipe to use up overly ripe bananas instead of making banana bread.  This recipe is super easy and I basically just threw all the ingredients into my stand mixer.   If you don't have a stand mixer, you can easily mix everything together in a bowl by hand.  Go ahead and spoil your dogs soon!

Update - these dog treats sold out first at the charity bake sale!  Yay!


Peanut Butter and Banana Dog Treats

Ingredients
1 egg
1/3 cup peanut butter, creamy
2 ripe bananas, mashed
1 tablespoon honey
1 ½ cups flour
1 cup oats
½ teaspoon cinnamon (optional)


Directions

Preheat oven to 300 degrees F.  Line baking sheets with parchment paper or lightly grease baking sheet (spray with non-stick cooking spray).

In a stand mixer, mix together egg, peanut butter, bananas, and honey.


Slowly add in flour.

Next, stir in oats and cinnamon.

Drop by spoonful onto baking sheets. 


After 15 minutes, I removed from oven and flattened with a fork and continued baking for additional 15 minutes.


*Total bake time 30 minutes.

Remove from oven and cool on a wire cooling rack.


Makes about 30 treats.

Monday, November 19, 2012

Cream of Mushroom Soup


You probably normally buy canned condensed cream of mushroom soup, because I always did.  I came upon a couple recipes for homemade cream of mushroom soup and it is so much better!  I adapted my recipe from the FinerThings in Life and HeavenlyHomemakers.  I use cream of mushroom soup in a lot of recipes so this is great that I can use my own homemade version.  Not only is this more healthy, its more cost effective.  Hope you can try this recipe too for the next time you need cream of mushrooms soup for a recipe.  I'm using it in my green bean casserole (recipe to be posted soon). You can also just eat it as is if you like cream of mushroom soup because it is delicious!

 
Cream of Mushroom Soup

Ingredients
1 cup sliced mushrooms (I used cremini mushrooms.)
3 tablespoons butter
¼ cup cornstarch
4 cups milk, divided
1 teaspoon salt
½ to 1 teaspoon black pepper

Directions

In a large pan, over medium heat, add butter and mushrooms.  Sauté until mushrooms are tender, about 5 to 7 minutes.

In a bowl, combine cornstarch with 1 ½ cups milk.  Whisk until combined.  (You could also use a lidded container to shake together the cornstarch and milk until combined.)

Next, whisk the cornstarch mixture into the mushrooms.

Slowly add the remaining milk.  Season with salt and pepper. 


Whisk until smooth and soup is thickened.

Saturday, May 19, 2012

Homemade Pizza Pockets


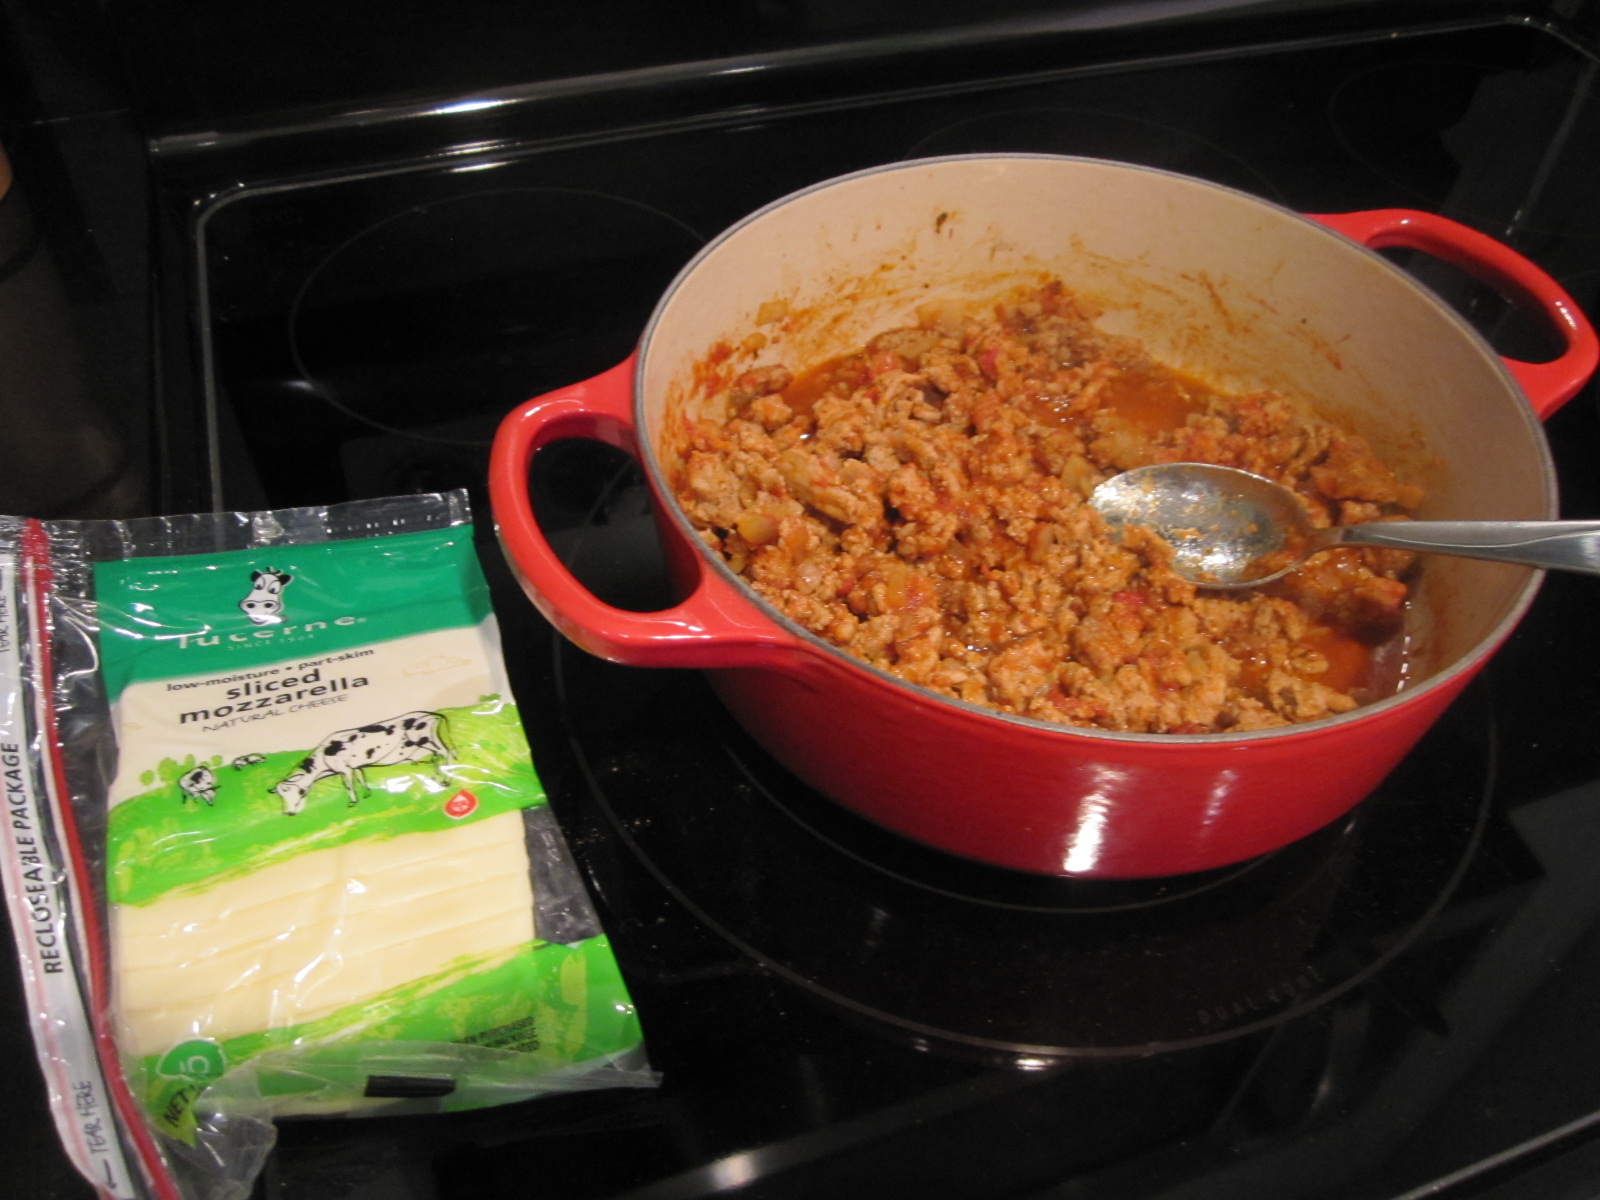
You know the Hot (and Lean) Pockets you can buy at the grocery store in the freezer section?  I admit I will occasionally buy Lean Pockets when they go on sale since they are easy to bring to work for lunch.   But after discovering how easy it is to make homemade pizza dough,  you can use the same pizza dough to make homemade pizza pockets!  I adapted the recipe from Money Saving Mom's freezer meals postings.  I love how versatile you can make your filling too, because I used what I had already.  These homemade pizza pockets were so delicious; the filling was hot and the crust was crisp.  Since I had doubled the pizza dough, I made pizza with half and pizza pockets with the other half.  Any leftover pizza pockets can be frozen too, how awesome is that?!  

 
Ingredients

For the pizza dough:
1 tablespoon active dry yeast (I use Red Star yeast from Costco.)
1 cup warm water (105 to 115 degrees F.)
1 teaspoon sugar
1 teaspoon salt
2 tablespoons oil (olive or vegetable)
2 ½ cups flour

For the filling:
1 pound ground turkey
½ onion, diced
1 teaspoon garlic powder
1 teaspoon cumin
1 teaspoon chili powder
½ teaspoon salt
½ teaspoon ground black pepper
1 cup tomato sauce
mozzarella cheese (shredded or sliced)

 
For the pizza dough:

In a large bowl, add yeast and warm water.  Use a whisk to dissolve the yeast in the water.  Next add in the remaining ingredients and mix with a wooden spoon.  Knead dough on a floured surface for about 5 minutes.
 
For the filling:
In a large pan, brown ground turkey with diced onion.  Add in spices.  Add tomato sauce and stir to mix together.  (Feel free to add other filling ingredients of your choice, such as pepperoni, diced peppers, mushrooms, etc…)


For the pizza pockets:

Preheat oven to 450 degrees F.

Divide dough into 10 to 15 pieces.  Roll dough pieces into balls.  Next, flatten dough balls with a rolling pin.  Spoon about 2 tablespoons of filling onto one side of the dough circle.  Sprinkle with shredded cheese or half a slice of cheese.  Fold dough over and seal tighly with fingers or a fork. 


Bake on a greased baking sheet for about 15 minutes until lightly browned.  You can also lightly sprinkle some cornmeal to add some texture to your pizza pockets.


Place pizza pockets from oven to a cooling rack.   If you have leftovers, you can freeze them!


After they cool completely, store in a freezer bag for up to 2-3 months.  To reheat frozen pizza pockets, microwave for about 2 minutes or warm in the oven for about 20 minutes at 350 degrees F.  Check to make sure they are heated through before serving.  Enjoy!