Pages

Showing posts with label Lunch. Show all posts

Sunday, July 14, 2013

Turkey Chili


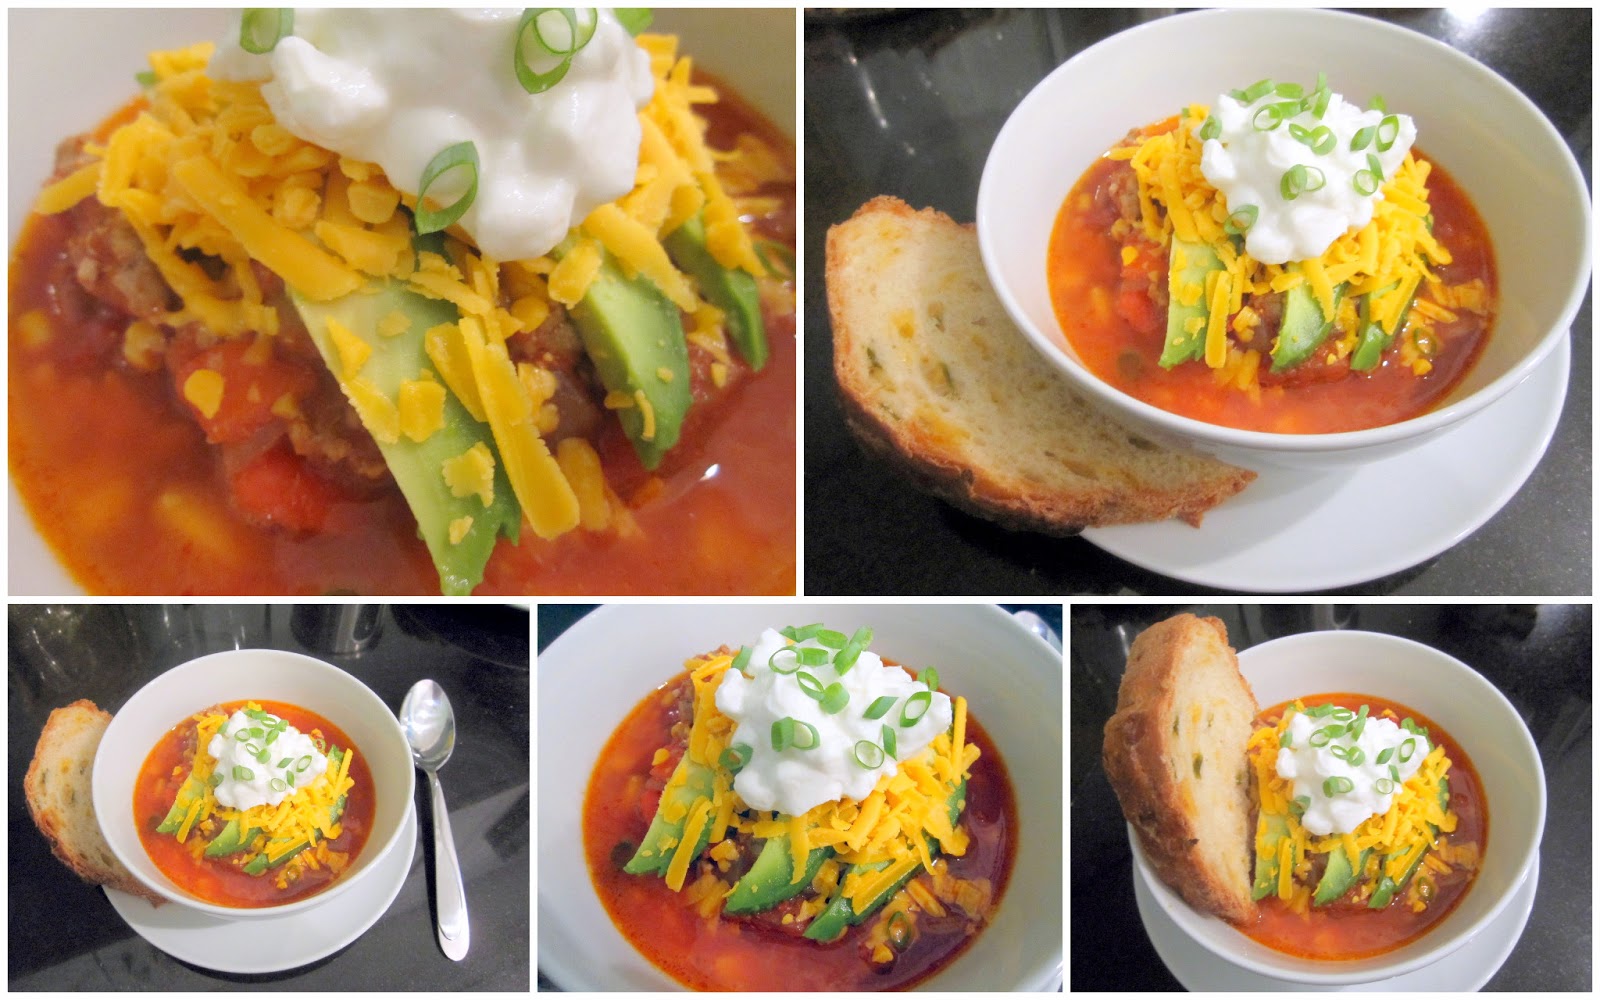
Sorry I have been so busy lately and have not had enough time to blog my recipes.   I started a review class a couple nights a week that is work-related to obtain a certification, which is great, but it only reminds me I am not a young college student anymore.  Working all day and then having to take an evening class for another 3 hours is exhausting!  Also the class material is not easy, mostly math and sciences - another reminder that I'm rusty on the material.  The passing statistics on the certification exam is not great, less than 50% pass and in 2010 it was 39% passing of those who took it!  How crazy is that?  Anyway I'm sidetracking...back to this turkey chili, which is awesome.  It took me less than an hour to prep and cook, so not only is this an easy recipe - it is delicious!  I love that I will have plenty of leftovers for work lunches and you can also freeze any leftovers.  I served this turkey chili with cheddar cheese, that I grated myself, sliced avocados, plain greek yogurt and sliced scallions.   I also had jalapeno cheddar bread from the farmers market this week and it went really well with the turkey chili.  


In addition, for a separate meal, you can make a pasta with the turkey chili and add the same toppings.  Enjoy!


Turkey Chili
Ingredients
1 to 2 tablespoons vegetable oil
1 onion, diced (yellow or red)
2 large bell peppers, diced (or 8 to 12 baby peppers)
2 or 3 cloves garlic, minced
1 pound ground turkey
4 or 6 ounce can diced fire-roasted green chiles
15 ounce can pinto beans, rinsed and drained (or kidney beans/black beans)
11 ounce can mexicorn, drained (or whole kernel corn)
28 ounce can crushed tomatoes
15 ounce can diced tomatoes
1 tablespoon tomato paste
1 teaspoon cumin
2 tablespoons chili powder
salt and pepper
Optional Toppings
shredded cheddar cheese
plain greek yogurt or sour cream
avocado, sliced or diced
scallions, sliced
cilantro, chopped
tortilla or corn chips


Directions

Heat vegetable oil in a large pot over medium–high heat.  Add diced onions, bell peppers and garlic.  Sauté for about 5 minutes.

Add in turkey and break up with wooden spoon.  Season with salt and pepper.  Cook turkey until no longer pink, about 3 to 5 minutes. (Note: I added in a little cumin and chili powder to season the turkey.)


Stir in green chiles, pinto beans and corn.  


Pour in diced tomatoes and crushed tomatoes.  Stir in tomato paste.


Stir in cumin and chili powder.


Reduce heat to low.  Cover and simmer for 30 minutes.  Continue to stir occasionally.

Serve in bowls with your favorite toppings.  (Serves 6 to 8)


Sunday, January 13, 2013

Ham and Swiss Omelet


This was probably the best omelet I have ever made!  I actually watched a youtube video to see how an omelet is properly made.  Click here to see the video I watched.  I didn't follow the exact recipe for her omelet, but used what I had already.  I followed her technique on how to cook the omelet.  It really was easier than I thought it would be.  I love that you can eat an omelet for any meal since it is so filling.  I made it for lunch this weekend and it was so good.  Enjoy!


Ham and Swiss Omelet

Ingredients
3 eggs
2 tablespoons water or milk
2 slices ham, diced
¼ cup shredded swiss cheese
1 tablespoon butter
pinch of salt
pinch of black pepper


Directions

In a bowl, whisk together eggs, water, salt and black pepper.


In a small non-stick skillet, melt 1 tablespoon butter over medium heat.

Add egg mixture to skillet and allow to cook for 1 minute.  

Lift edges of omelet with a spatula to allow uncooked egg mixture to flow underneath.  Allow to cook additional 2 to 3 minutes, until almost set.

Flip omelet over and top with ham and cheese.  Allow to cook for 1 minute.
Carefully using spatula, roll omelet into thirds (French style) or fold omelet in half.

Serve immediately.


Monday, December 3, 2012

Spinach and Kale Roll


This is probably the most easy dish you could make, and it is perfect as a vegetarian appetizer or main dish too.  You only need 2 ingredients basically - frozen puff pastry and Trader Joe's spinach and kale greek yogurt dip.  If you don't have eggs, you could omit the egg wash but it gives it a nice color when baking.  I love Trader Joe's obviously, and their spinach and kale greek yogurt dip is awesome.  I usually like to eat the dip with Trader Joe's Whole Wheat Lavash Chips!  But you will love this spinach and kale roll instead, enjoy!

Spinach and Kale Roll

Ingredients
1 sheet frozen puff pastry, defrosted
16 ounces spinach and kale greek yogurt dip (from Trader Joe’s)
1 egg, beaten


Directions

Preheat oven to 350 degrees F.

Line a baking sheet with parchment paper.

Unfold puff pastry sheet and lay puff pastry sheet flat.


Spread spinach and kale greek yogurt dip on the puff pastry sheet.


Roll the dough and place seam side down onto parchment lined baking sheet.
 
Brush with beaten egg.


Bake for 45 minutes to an hour, until slightly browned.


Let stand at least 5 minutes before slicing.


Monday, November 26, 2012

Creamy Mushroom and Artichoke Soup


This creamy mushroom and artichoke soup is one of my favorites.  It is a really easy soup to put together for either a meal or as a starter.  This soup can be really filling and is perfect for a light dinner or lunch.  I’ve been making this soup for a couple years now and everyone who has tried it so far enjoys it.   It has been crazy busy these last few days with Thanksgiving and now back to work.   Enjoy!


Creamy Mushroom and Artichoke Soup

Ingredients
½ cup onions, diced
1 cup mushrooms, diced (I used cremini mushrooms.)
½ cup artichoke hearts, diced
3 tablespoons butter
1 tablespooon cornstarch
4 cups chicken stock, low sodium
1 cup heavy cream (You may use half and half or milk.)
1 teaspoon salt
½ to 1 teaspoon black pepper


Directions

In a large pan, over medium heat, add butter, onions, and mushrooms.  Sauté until onions and mushrooms are tender, about 5 to 7 minutes.


Stir in diced artichokes.

In a small bowl, whisk together cornstarch with 1 cup chicken stock. 


Pour in cornstarch mixture.  Slowly add in remaining chicken stock.


Cover and allow to simmer on low for 30 minutes.

Next, stir in heavy cream.  Season with salt and pepper.


Serves 4 to 6.

Tuesday, November 13, 2012

Lemon Pepper Pappardelle with Broccoli and Bacon


I absolutely love Trader Joe's and when I saw their lemon pepper papperdelle pasta, I knew I had to get it.  The lemon pepper flavor shines in this pasta and it is delicious.  Add some broccoli and bacon to this lemon pepper papperdelle pasta and you have one amazing meal.   I also used my new garlic press from the pampered chef and it is awesome!  You will see what it looks like in some of the pictures below.  I feel old when I get excited about kitchen gadgets!  Haha!  Overall, this took me less than 30 minutes to make and would be a perfect weeknight meal when you are short on time.  Enjoy!

Lemon Pepper Pappardelle with Broccoli and Bacon

Ingredients
1 package lemon pepper papperdelle pasta (from Trader Joe’s)
1 head of broccoli, cut into florets
3 cloves garlic, minced
¼ cup chicken stock, low sodium (or use water)
2 to 3 tablespoons olive oil
4 or 5 slices bacon, cooked and crumbled (optional)
1 tablespoon butter (optional)
salt and pepper to taste
parmesan cheese, grated (optional)


Directions

Cook lemon pepper papperdelle pasta according to package directions.  (Boil for 8 to 10 minutes and drain.)

Cook bacon in microwave by laying bacon slices on top of a couple paper towels.  Cover bacon slices with additional paper towels.  Microwave on high for 4 to 5 minutes. Check to make sure they don’t burn after 4 minutes then if needed continue cooking for additional 30 seconds at a time.


In a large pan, over medium heat, add olive oil and garlic.


Next, add in broccoli florets and sauté for 3 to 4 minutes.

Pour in chicken stock or water.  Cover pan and cook broccoli for 5 minutes.

Remove cover.   Season broccoli with salt and pepper.   Add in cooked pasta, butter and crumbled bacon.


Toss with parmesan cheese.

Serves 4. 

Monday, November 5, 2012

Buffalo Chicken Pockets


These buffalo chicken pockets turned out so good!  I've made homemade pizza pockets before  and they were awesome.  I wanted to change things up and these buffalo chicken pockets definitely give a kick.  I basically made a buffalo chicken dip filling, which you could use just as a dip minus the pizza dough.  These will be great for a quick lunch or dinner.  I did freeze most of them to have on hand for a quick meal.  When I made these, I didn't close the seal the pockets well with a fork but for the second batch, I just pinched the seams with my fingers and it turned out much better.  Don't worry too much if the filling oozes out some, it will still be delicious even if it doesn't look pretty.


Buffalo Chicken Pockets

Ingredients
1 batch homemade pizza dough (recipe here - http://sophieinthekitchen.blogspot.com/2012/05/pizza-dough.html)
2 cups shredded rotisserie chicken
½ cup hot sauce (I used Frank’s hot sauce.)
½ cup ranch dressing (I used Hidden Valley Light.)
8 ounces cream cheese (I used 1 package of low fat cream cheese.)
1 cup shredded cheese (I used an Italian mix.)
olive oil


Directions

Preheat oven to 400 degrees F.  Grease baking sheet with olive oil.

In a bowl, combine chicken, hot sauce, ranch dressing and cream cheese.  Stir in ½ cup shredded cheese.  

Divide dough into at least 8 pieces.   Roll dough pieces into balls.  Next, flatten dough balls with a rolling pin.  Spoon about 2 tablespoons of filling onto one side of the dough circle.  Sprinkle with shredded cheese.  Fold dough over and seal tightly with fingers or a fork.  

Bake on a greased baking sheet for about 20-25 minutes until lightly browned.

Serve immediately.   If you have leftovers, you can freeze them!

After they cool completely, store in a freezer bag for up to 2-3 months.  To reheat frozen buffalo chicken pockets, microwave for about 2 minutes or warm in the oven for about 20 minutes at 350 degrees F.  Check to make sure they are heated through before serving.  Enjoy!

Saturday, October 20, 2012

Mini Spinach and Cheese Quiches

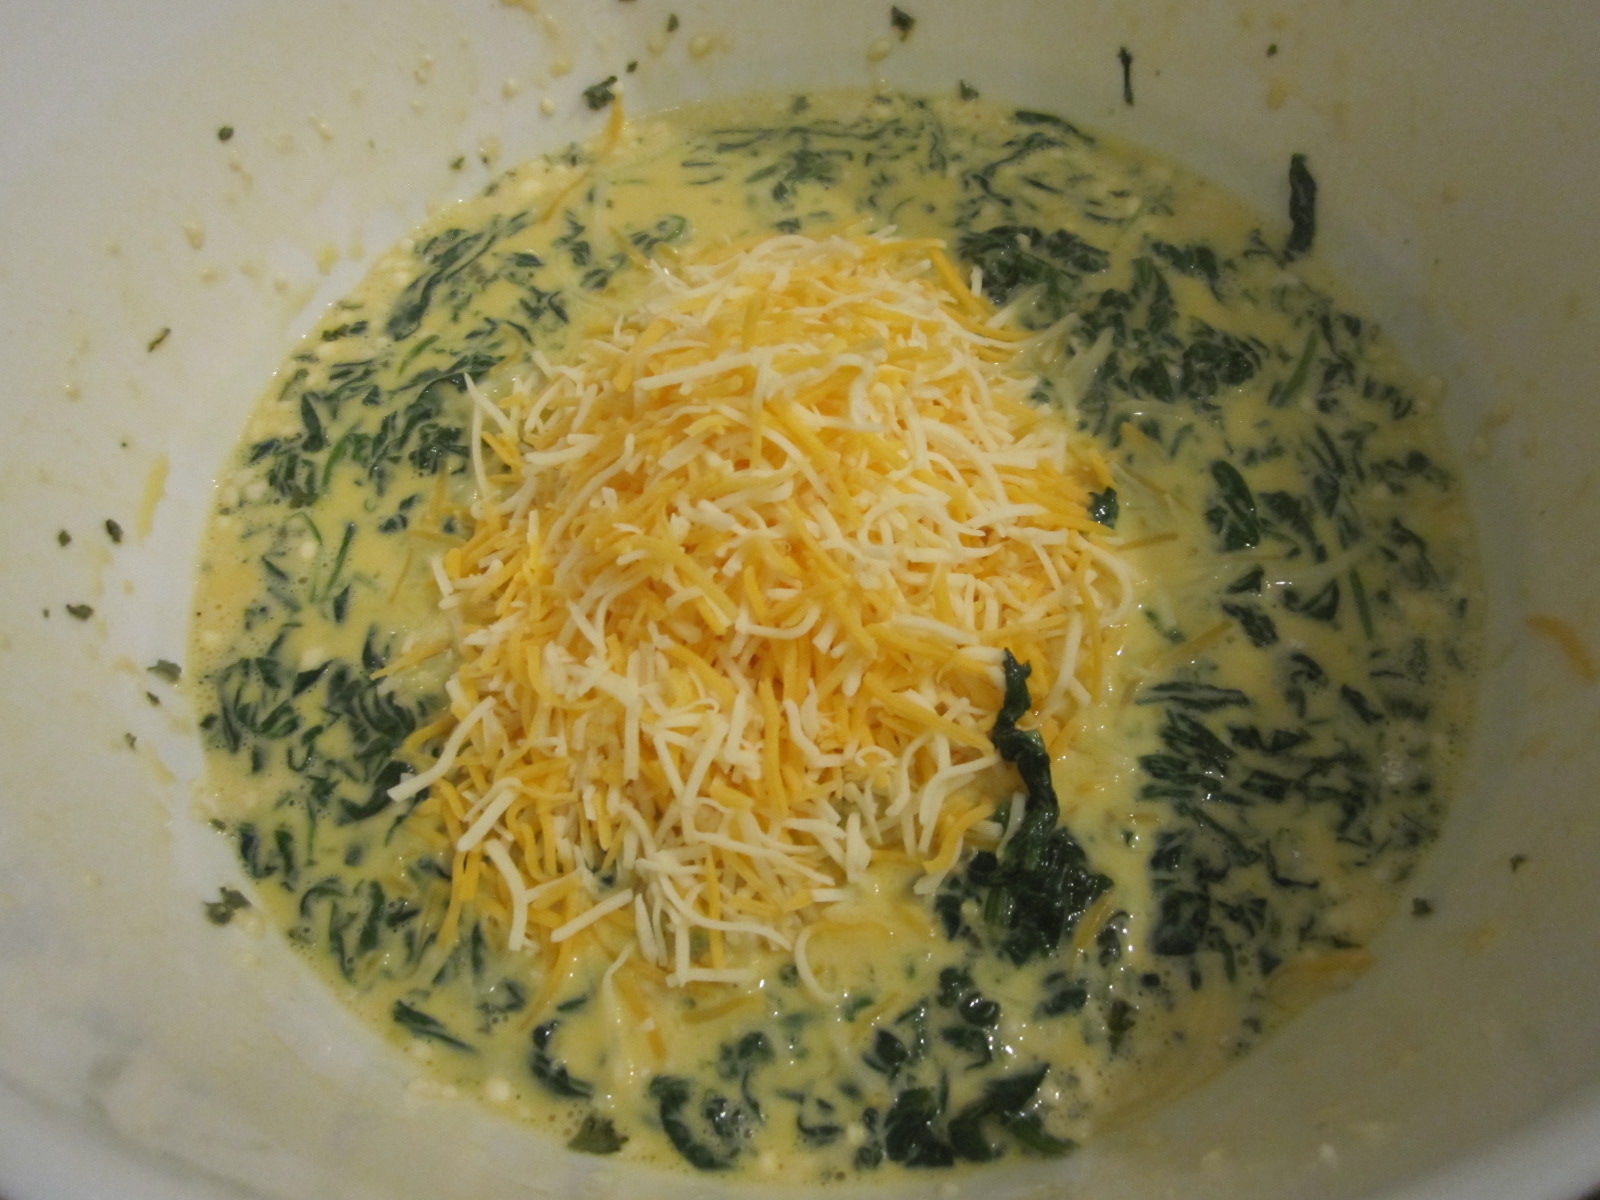
These mini spinach and cheese quiches are perfect for breakfast, lunch or brunch.  They are perfect for me to bring to work since they reheat well in the microwave.  I adapted this recipe from The Domestic Mama and The Village Cook's spinach and cheese baby quiches (original recipe here).  I made my spinach and cheese quiches in muffin pans, and used fresh spinach instead of frozen.   I will definitely be making these mini spinach and cheese quiches again and I would like to add some cooked bacon next time.   I am also freezing half the mini spinach and cheese quiches to see how they hold up.  I'll update this post when I find out.


Mini Spinach and Cheese Quiches

Ingredients
1 ½ cups spinach (Cook two 9 ounce bags fresh spinach or use frozen spinach, thawed and drained)
12 ounce can evaporated milk
2 tablespoons flour
3 eggs
½ teaspoon salt
½ teaspoon parsley, dried
¼ teaspoon garlic
1 ½ cups shredded cheese (I used a cheddar jack blend.)
Optional (if cooking spinach)
1 to 2 tablespoons olive oil
salt and pepper to taste


Directions

Preheat oven to 375 degrees F.  Grease a muffin pan.

In a large pan, over medium heat, add 1 to 2 tablespoons olive oil.  Add in 1 bag of spinach and when wilted, add the second bag of spinach.  Stir and season with salt and pepper.  Cook for a few minutes until spinach is completed wilted.  Allow to cool.

In a medium bowl, combine milk, eggs and flour.

Add spinach, salt, parsley, and garlic.

Stir in cheese.


Pour into greased muffin pan.


Bake for 15 to 18 minutes.

Makes 12 mini quiches. 


Freeze extra quiches in freezer bag.